


Noone has commented on this article yet.
Filed under:
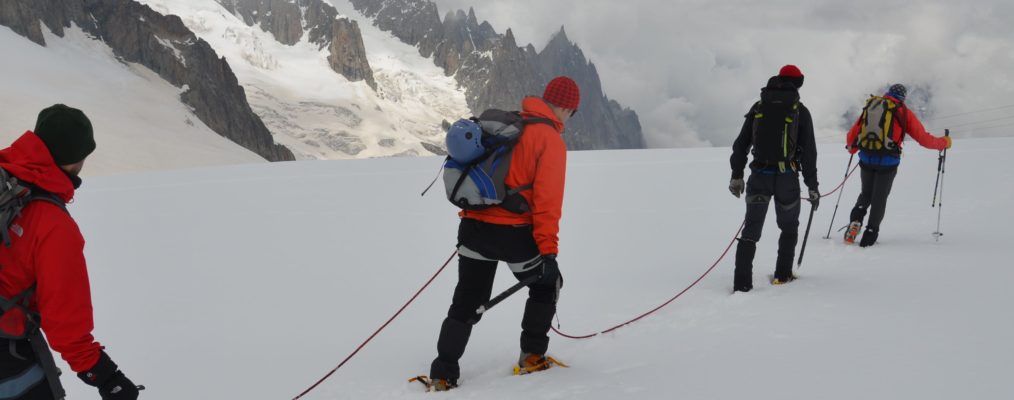
All Skills, Alpine Summer, Glacier Travel, Ice & Mixed Climbing, Mountaineering, Ski Touring, Skills & Advice,Preparation for glacier crossing should be meticulously prepared and rehearsed, so that no time is wasted either setting up the basic moving-together system or any of the techniques that may subseqently follow. The distances between group members must be carefully calculated to ensure that just the right amount of rope is left to initiate a rescue, and so that a loop of it can be lowered to the person in the crevasse. For two of you travelling together, the distance between you needs to be in the region of eight metres, with the same between each if there are three or even four of you. For two people, taking 12 coils (covered below) of around 1.7 metres per coil will give enough rope to effect a rescue. For three people, the lead and last person can take nine coils, again with the same result. With four on a rope, six coils will work. Remember that, even though less rope is being carried in coils, should one of the group members from any position need rescuing, there will be enough rope to use once everyone has untied.
Put careful thought into your preparation before crossing crevassed terrain, and some practice, done in a controlled situation well before the skills are needed in anger, is essential. Everyone in your party needs to prepare themselves and the rope in such a way that a variety of extraction techniques can be carried out, depending upon what any given situation demands. Shortening the rope by tying coils off around your body is the standard way to set things up, and the following method is a simple and effective way of doing this. An advantage here is that, if there is any chance of you being suspended by the rope, this method of tying off the coils acts as a simple chest harness, helping to keep your body upright if you are wearing a rucksack.
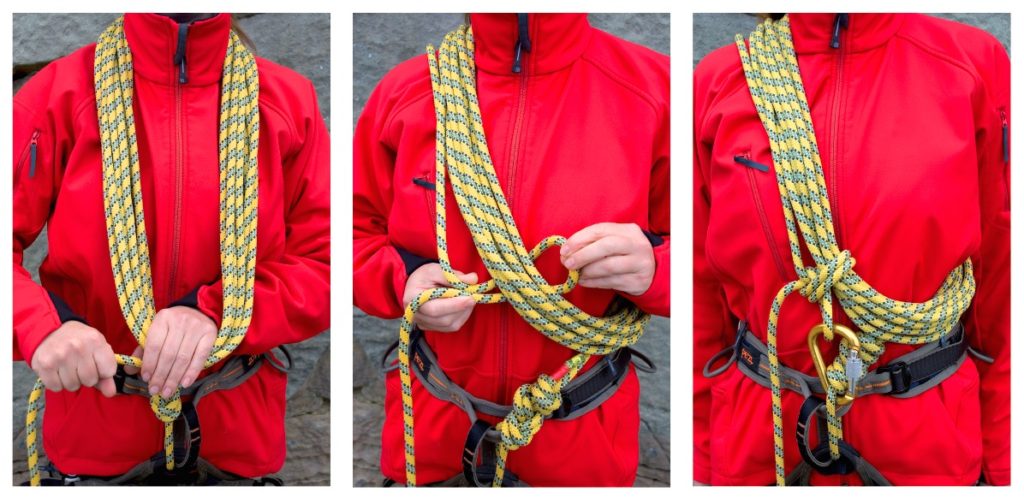
Taking coils for glacial travel
First, tie in to your harness. To take the coils, which must all be the same size, place either your left or your right hand, pointing out with your palm down, at a point around about hip to waist level. This will act as a measure to get the size of the coils equal. The exact point that you use will be the result of practice, with the amount of clothes that you are going to wear being one factor that may make a difference day to day. If you are using your left hand as the measure, bring the rope from your harness up around your neck in an anticlockwise direction, round and underneath your hand, keeping the rope and thus all of the coils snug.
Continue doing this, making sure that all of the coils are the same size, until around a metre or so more than the desired distance between you and your partner is achieved. In other words, if you want to have 8 metres (26ft) between you and your partner, the total amount of rope between you prior to locking it off, assuming that your partner is also taking coils, will be 10 metres (33ft). Once you have done this, put your arm, the one that has been used for measuring, through all of the coils so that they sit on your shoulder neatly and comfortably. After some practice, you should be able to get these so that they neither slide off your shoulder nor restrict your breathing due to them being too tight. Using a bight of the main rope from close in front of you, pass it around the back of the coils and up next to your chest, and tie a small overhand knot on the bight around all of the coils, making sure that the resulting tail loop is as short as possible, and that there are no loose coils or flappy bits of rope left around. Now clip a small screwgate karabiner into either your abseil loop or tie-in loop, and clip the overhand knot loop into this. If you have tied it correctly, you will find that you have to stoop forwards slightly in order to clip it in and, as you stand up straight again, the coils around your shoulders will be pulled snug as the knot comes tight.
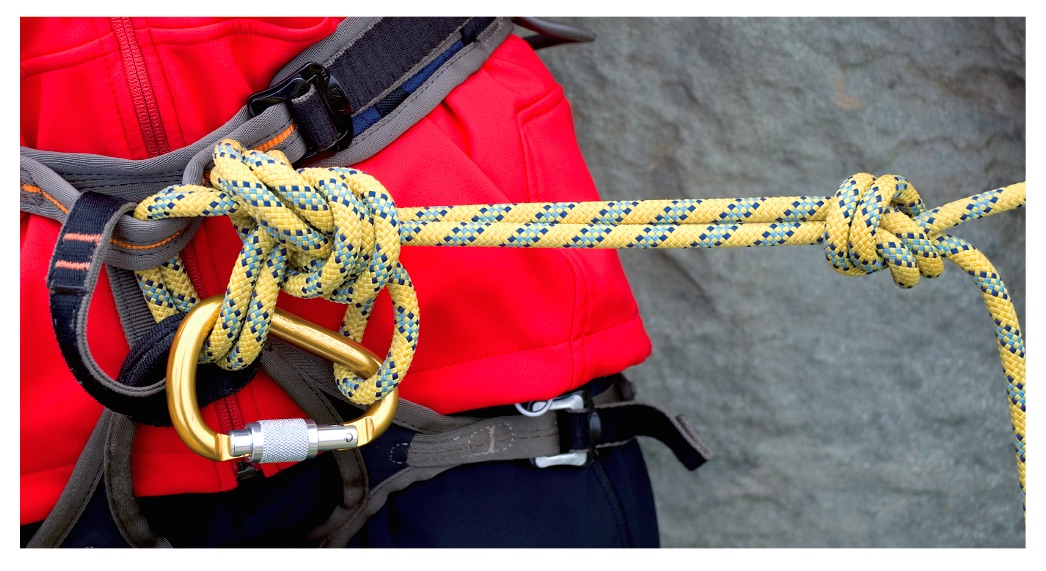
Tied onto the middle of the rope using an isolation loop
Bear in mind that carrying hand coils should never be done. All that these do is to simply increase the distance that a victim will fall and makes the resultant shock-loading on the person remaining on the surface far greater than if they had been simply roped together conventionally. If you see coils being carried, chances are that they are being used for the technique known as short roping, something that should only be carried out by professionals or those with a high degree of training, but is still not appropriate for glacier travel. If you are travelling as a party of three or more on the same rope, those between the ends can tie on, using a rethreaded overhand knot on the bight, keeping the resulting loop end short and clipping this back in to the rope tie-in loop with a screwgate karabiner to stop any chance of it unthreading.
To make things a little more comfortable, they can first create an isolation loop by tying an overhand knot or an Alpine butterfly in the main rope, and tie the overhand on a bight at the end of this. When completed, the distance between the two knots should be about waist- to knee-length. Doing this allows the middle person to walk slightly to the side of the rope, and they will not be pulled around by the motion of their companions.
Other items to prepare will include three or four screwgate karabiners, one or two ice screws and slings, a pair of prusik loops or small mechanical ascenders and maybe a lightweight pulley per person. Whatever you carry should be tailored to the terrain and the number in your party. Once you have taken the coils, it would be a good idea for at least the first and last person to have a prusik loop clipped with a short sling to the front point of your harness, and this goes for all of your group members. This can be arranged as either a klemheist or a French prusik, as if need be these knots can be quickly altered from one type to the other. The klemheist attached to the front person’s harness would be of use should they fall into a crevasse and need to ascend the rope to get out, and therefore they have one prusik attached and ready. The French prusik on the harness of the person or persons left on the top of the glacier would be directly to hand so that a method of transferring the weight of the victim from them to an anchor system could be quickly and efficiently carried out.
You may decide to use a small mechanical ascender in place of the prusik loop, but bear in mind that these are often non-reversible. Another option, for two or more climbers, is to use the knotted rope method. This can provide security via a number of small overhand knots on the bight tied at intervals along the length of the rope. The idea is that, should the lead person fall into a crevasse, the knots will cut into the snow and ice at the lip as they drop, and stop them from falling in for any distance. The length of rope between the front two climbers should be in the region of 20 metres (60ft) once a series of overhand knots on the bight have been tied. This method works well in a number of situations, particularly if the person in the crevasse is able to clip into each of the overhand knots in turn as a means of self-rescue, using a sling as a foot loop and a shorter sling to their harness.
However, there are a couple of drawbacks with this system. Firstly, having knots in the rope may prevent the fallen climber from being able to efficiently prusik out, as the knots will stop the klemheist and French prusik from being slid up the rope. Secondly, the knots will negate the use of a hoisting system, as they would not allow the rope to run through a pulley, a French prusik or mechanical device. It is obviously up to you to decide whether this system is appropriate enough to be used in any given situation. However, if you are with a party of three or four inexperienced members and have to cross crevassed terrain, the security provided by this system is quite high. The main rescue criterion is therefore the ability of the group members remaining on the surface to collectively pull on the rope and drag their companion up and out of harm’s way. However, the drawbacks will, for many, preclude its use.
Words and images: Pete Hill Main image: Chris Kempster