


Noone has commented on this article yet.
Filed under:
Climbing & Mountaineering, Crampons, Gear reviews,This is almost a rant, except that I’m not really blaming anyone. It’s more just a sort of online scream of frustration born of several weeks spent trying to work out optimal crampon fit across a range of winter boots and crampons. I mean, just how hard can it be?
The answer to that, I’m afraid, is very bloody hard indeed because – guess what – there is no boot/crampon standard. In short, different boots have different toe and heel profiles. Soles are different thicknesses. Toe-rands, where present, may stand out further than the edge of the sole. Or they may not. The amount of rocker on the forefoot of boots varies. And so does the the front to rear curve – some are asymmetric, some really aren’t. And all these things may vary. Meanwhile, crampons have no fixed standard either. Toe bails, where used, locate at different points and are different heights, profiles and dimensions. Cradle-type fittings aren’t much better – they tend to locate using twin front post fixings which sit at different widths and at different distances from the front of the crampon.
None of this makes getting crampon fit right remotely straightforward. You can’t even rely on a specific crampon working with a particular model of boot because while a size 40, Super Alpine Destroyer might match the Ice Lacerator crampon perfectly, the wider toe of the size 45 Super Alpine Destroyer could mean that it sits far enough back on the crampon that there’s now too much front point showing.
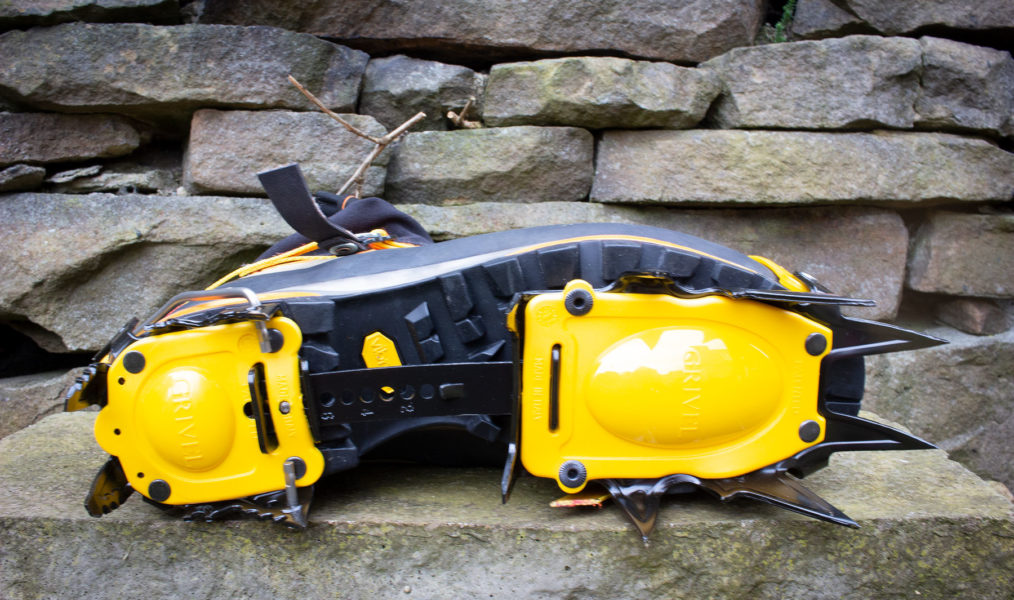
Mix-and-match is the traditional approach to fitting crampons
Why does it matter?
It matters most to climbers to be honest. Check out this excellent Will Gadd blog post for more detail – – but in a nutshell, if you don’t have enough front point showing and the secondary point isn’t far enough forward to support the front points, then you’re going to have trouble getting a stable foot placement on steep ice. At worst, your overly short front points will mean your boot toe is repeatedly thwacking into the ice before your points bite properly. And dropping your heels to engage your secondary points won’t work because they’re simply not far enough forward.
There’s more too. If you use a straight crampon on asymmetrical boots – Scarpa’s Phantom series for example – the your crampon points will be out of kilter with the curve of your boot and over to one side or the other in an awkward on rock sort of way. They may even overhang the sole of your boot in the sense of sitting outside it. If the toe bail of your clip-on crampon is too wide, there’s potential for the crampon and front points to move sideways when kicking in. Not good. And if the crampon doesn’t match the contour of your boot sole closely, it could stress the metal more potentially leading to failure over time.
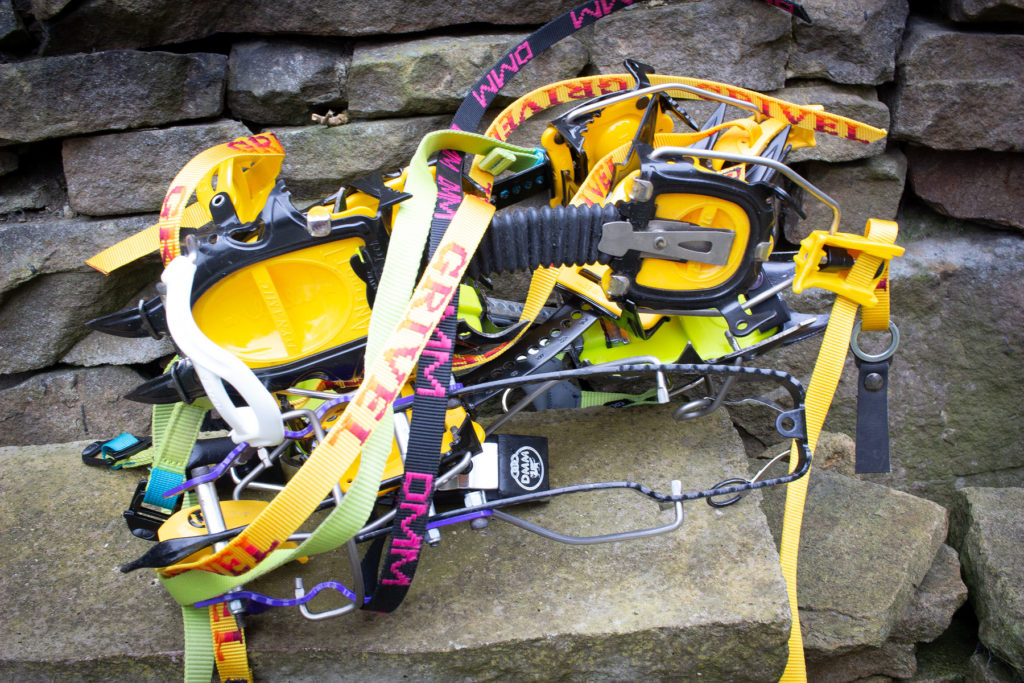
Ideally you’d take your boots to a retailer selling different crampon brands to see what fits best
What’s the answer?
Traditionally, advice has always been to take your chosen winter boots in to a well-stocked crampon retailer – yes, not in Yellow Pages I know – and try different crampons until you find one that perfectly matches you model and size of boot. All good on paper, but there are problems with this approach too. For a start, it’s hard to find a shop selling multiple crampon brands and models in many areas. There may be a crampon that fits your boot perfectly right out of the box, but your retailer may not stock it. On top of all this, it may simply be that there isn’t a crampon available anywhere that fits the boot you have, in the size you wear, perfectly without modification. More about that in a minute. You can ask the internet. But bear in mind that not only does crampon fit vary with different sizes of the same boot, but the people you’re talking to may not know the difference between a good fit and just and okay one.
Which brings us to the third option: hacking your crampons…
How to hack your crampons
First, do not literally hack or batter your actual crampons. Bending or bashing them into a different shape runs the risk of weakening the metal and trying to bend a pair to match curve of your boot sole, for example, would require a lot of force. That said, you can, with effort and ingenuity, modify several component parts of the crampon to improve fit, though it may get expensive.
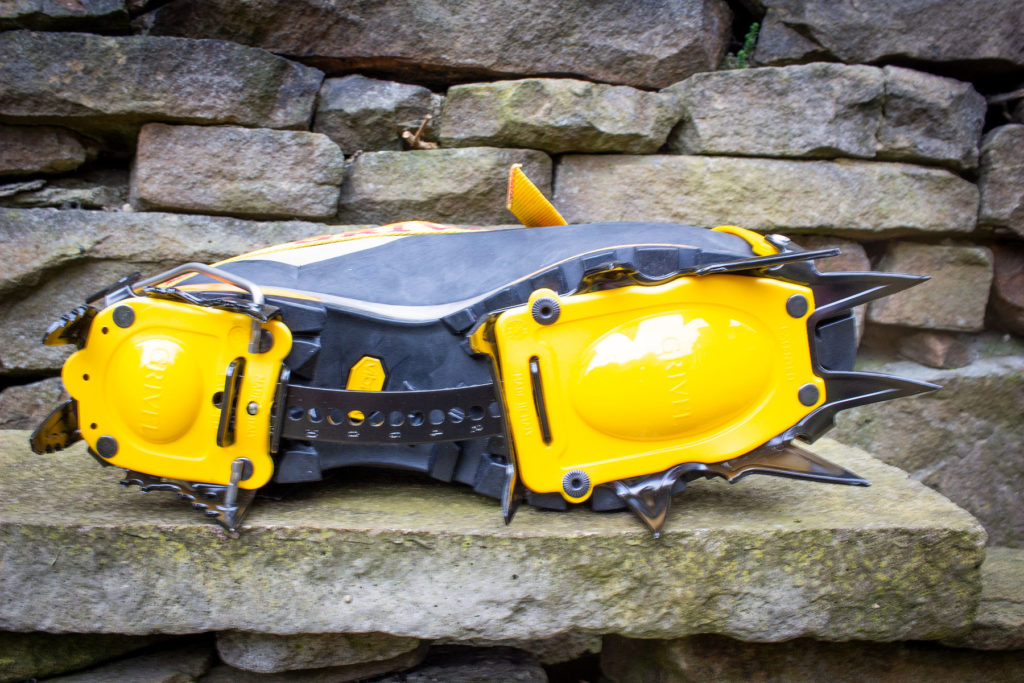
Customising your toe bail is a good place to start
Alternative toe bails
If you’re not happy with your front point projection and/or secondary point location, the first place to start – assuming your crampons aren’t modular and allow front point movement – is with the front bail. The first thing to look at, is whether there’s an alternative locating hole for the front bail. If you can move the bail back, more front point will project. If you move it forward, you’ll have less front point.
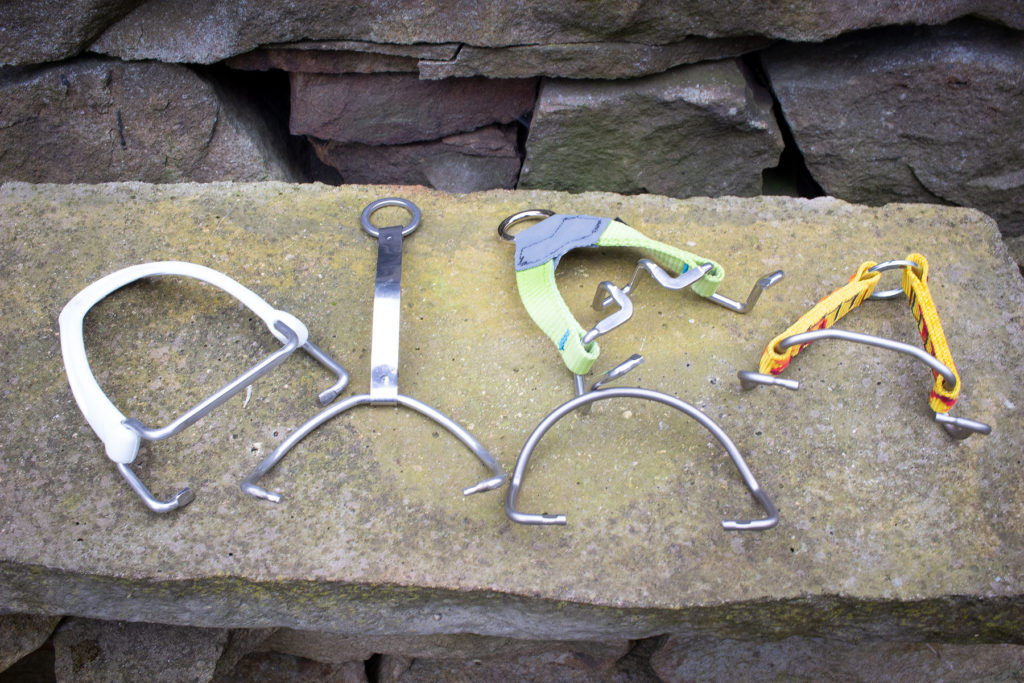
Most crampons have a couple of locating hole options, Petzl tend to have three, making them slightly more adjustable. Try that first. If that doesn’t work, your next option is to try a different front bail, not necessarily from the same brand – with a little ingenuity most will swap onto crampons made by someone else. You could, for example, stick a Petzl front bail on a Grivel crampon or vice versa. Or thrown in a Black Diamond ‘narrow bail’ to match a narrow-toed boot.
There are plenty of options. Grivel, for example, sells standard, narrow and offset front bails as well as a ‘shorter armed’ Rambo bail that suits boots with thinner sole units. Black Diamond has standard, narrow and wide bails. While Petzl has standard ones, but also a Fil Flex front bar, that you could also use to convert most clip-in, fully automatic crampons to semi-automatic with just a heel clip. You can also buy the bails and attachments for Edelrid’s modular Shark crampons separately and fit them to other models. With all models, you may need a bit if deft work with a file to fit the ends through the existing holes – file the bail, not the crampon.
Changing the length of the bail arms will impact on how far forward the front point projects. Changing the width of the bail will potentially give a closer, more secure fit and remove the possibility of the toe of the boot moving inside the bail. You can, if you choose, use force to change the shape of the bail, but it’s your call. One more thing, doing any of this will almost certainly void any warranty, so be aware. Which bails to use? Ask the internet for some starting pointers, but don’t take recommendations as gospel.
How to change bails
Some bails will spring out relatively easily once you have the ovalised holes lined up with the bail end profile, but it’s not usually that easy. What works for me is to locate one side of the bail in the chosen hole, then larksfoot a climbing sling or length of cord around the other side of the bail. Put the crampon sideways on the floor, then hold it in place – carefully, they are spikey things – with a shoed foot. Then pull up on the cord and carefully line up the bail and the hole before easing it into place. Then remove the sling or cord. Don’t just stick the bail through a sling, once in place, you won’t be able to remove the sling without cutting it. Obviously.
Cradle-type crampons
Things get much harder with ‘semi-automatic’ crampons featuring a heel-clip, but a cradle-type front fitting. Essentially they’re not adjustable, though at least two brands – Petzl and Edelrid – allow you to swap between bail-type clip fittings and cradle ones. Some Black Diamond ‘Clip’ model crampons sold with front cradle or basket fittings also have the holes for a front bail as standard, so you could probably change them to the ‘Pro’ type fully automatic fitting, though you might also have to remove the arms to which the clip mounts making it an irreversible process. Otherwise you’re pretty much stuffed. Don’t be tempted to bend the crampon posts, these are stressed areas. You might with some ingenuity be able to add some sort of spacer to the posts to sit your boot slightly further back and expose more front post. Use your imagination is my advice.
GSB crampons
A quick footnote for anyone with the old Grivel GSB crampons, which featured a front prong which mated with a slit in the front of GSB-compatible Scarpa boots. You can convert these to either a fully automatic front bail or a cradle-type one using Grivel spare parts. You’ll need to carefully remove the prong assembly and bear in mind that as per usual, your warranty will be toast. That said, at least you’ll have useable crampons again.
Changing a straight linkage bar to a curved one should help if you have asymmetric boots
Linkage bars
The other component you can swap, though only within the brand’s range, is the linkage bar that joins the front and rear half of the crampon. If you have an aggressively curved boot which doesn’t match the curve of your crampon, Grivel and Black Diamond will sell you asymmetric bars to suit. In addition, you can usually source longer bars to suit bigger boot sizes. Finally, you can often reverse or swap the existing link bars to improve fit to your boots.
So there you go…
Really though, it would be great if getting a good crampon fit weren’t quite such a black art. Bear in mind too, that while it’s most important on steep ice, it’s still a factor for more general mountaineering. Hats off to Petzl for one, for making their crampons more adaptable than most – you can mix and match front and rear sections too – but it would be great if there was more general standardisation and maybe more adaptable crampons generally. It’s slightly ironic that the more forgiving cradle-type fixing actually turns out to be less adjustable or customisable than a full step-in, but how hard would it be to produce a cradle-type crampon fitting that can be spaced to optimise the fit on your boot and, in particular, the front point projection? And wouldn’t it be great to be able to compare front bail dimension and shapes easily to get an idea of which way to jump if you do want to hack that fully-automatic crampon to fit better.
In the meantime though, a little ingenuity goes a long way.
Gallery


