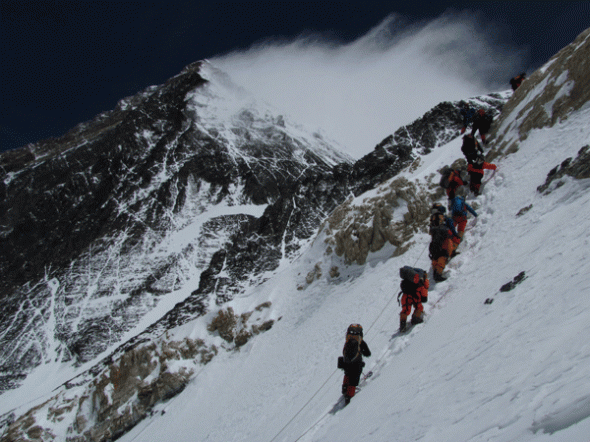
On big peaks it’s routine to make use of fixed lines (or ropes), but how do they work? In this series, Tim Mosedale explains the methods he uses when leading high-altitude expeditions…
Whether you love or loathe the idea, a lot of the big mountains usually have sections of what we call ‘fixed ropes’ put in place to allow expedition members, Climbing Sherpas and High Altitude Porters (HAPs) to progress up and down the route safely. One of the fundamental reasons is that it is usually easier, and safer, to equip sections of the mountain with rope than to have people roped together climbing alpine-style or swinging leads. This approach has traditionally been called ‘siege’ mountaineering. The alpine approach is a very pure way to climb a peak, but if one person needs a bit more time to acclimatise then it can jeopardise the summit success of that team of two or three climbers.
SAFETY FIRST
Arguably, fixing ropes reduces the skill level of those people who are then going to attempt the peak, which then increases the need for ropes to be fixed! But nowadays these people are probably going to go there anyway and their lack of mountaineering experience makes them a liability not only to themselves, but to everyone else around them. Even with ropes fixed in place one can feel extremely vulnerable and exposed when there are other, less proficient, teams clipped to
the same ropes.
Then there are the Climbing Sherpas and HAPs to consider. They are the backbone of many expeditions and without them being able to ascend and descend quickly, and safely, your logistics and supply chain would quickly fall apart. And the chance of any rescue bid being mounted in the event of an accident, people having problems due to extreme altitude, a change in the weather or equipment failure would be an absolute non-starter. Hence fixing ropes, which then allow individuals, or small teams, to move about the mountain and develop individual itineraries according to how they are feeling, if they want to rest, push ahead, team up with another person, weather conditions and so on. When used properly fixed lines are a very safe way for people to protect themselves but when used improperly, or when ignored entirely, then you can only imagine what the consequences might be.
There are a whole range of methods that you will come across for dealing with fixed ropes. If you ask 10 expedition leaders about using fixed ropes you’ll probably get 10 different answers. They’ll all agree on a few issues but opinions will differ and be divided on many matters, and every method has its pros and cons (some methods only have cons and you will be amazed what you see people doing in the name of safety).
I have developed a system over the years that most people are able to comprehend (and use!) and it works for every situation that you may come across. The key here is to keep the system simple, yet versatile. It can be picked up by even the most inexperienced novice but I would always advise that you already have a certain level of understanding about climbing and abseiling techniques. Learning and replicating skills is all very well, but putting them into context in an ever-changing vertical environment with a depth of understanding has got to be better. But before we begin on the actual techniques we use, in next month’s installment, let’s take a look at the essential equipment that you need…
 EQUIPMENT
- A harness
- Cow’s tails – I use a 3.5 to 4m section of 9mm dynamic rope.
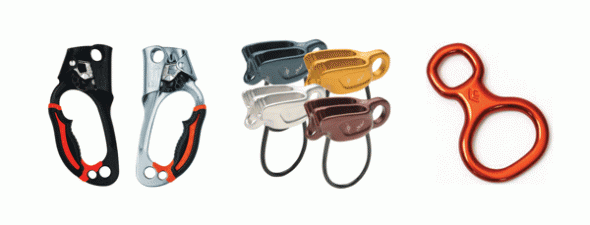
- A Figure of 8 (check out the Black Diamond Super 8 which is one of the best and lightest on the market). Because the ropes are often fixed at the bottom end (as well as the top!) any twists that are introduced into the rope have no way of escaping, and with the polypropylene and hawser laid nylon ropes that are sometimes used for fixing, a Fig of 8 is often less likely to cause twisting and kinking.
- A belay device (as a back up in case you drop your Fig 8) with big slots to ease rope threading and a big retaining loop to lessen the drop factor – Petzl Reverso and Reverso3 as well as the Black Diamond ATC Guide are recommended.
- 5 x locking karabiners – HMS/pear-shaped karabiners preferred due to ease of use with gloves or mitts on and their wide gate opening (but not the DMM Boa as they don’t always fit through the holes in the jumar). ‘Autolocking’ style karabiners are not recommended.
- Ascenders (jumars) – I highly recommend handled ascenders. You need to make sure that you can get a gloved mitt into the handle area though, so don’t go overboard with the mitts. The best device is probably the Petzl Handled Jumar whereas the Black Diamond Nforce Ascenders, with their extra moving parts, have been known to freeze up. Some of the fixed ropes that you come across on these big mountains are quite thin so it’s probably best to steer clear of the likes of Petzl Tiblocs, with their sharp teeth, and the dropability of small devices, like the Wild Country Ropeman, makes them unsuitable too. And that’s because you also need to have:
- A pair of thick gloves or mitts. Once you have acquired the relevant skills, always practise while wearing your thick gloves/mitts to get better acquainted with your gear and discover if there are any modifications you need to make to how you operate the gear (for instance applying some tension to allow you to open the karabiner by just pressing it against the rope).
- And lastly, an 8ft (120cm) sling and some prussiks.
In the next installment, we’ll look in detail at the techniques needed for ascending fixed lines.
ABOUT THE AUTHOR
 Tim Mosedale holds the Mountaineering Instructors Award and teaches climbing in Keswick, Cumbria. He is only the 10th Brit to have summited Everest from both sides and is running expeditions to Everest (South Col), Ama Dablam and Island Peak in 2013 and 2014. For more info, go to www.timmosedale.co.uk


