


Noone has commented on this article yet.
Filed under:
All Skills, Photography, Ski Touring, Skills & Advice, Walking / Trekking,
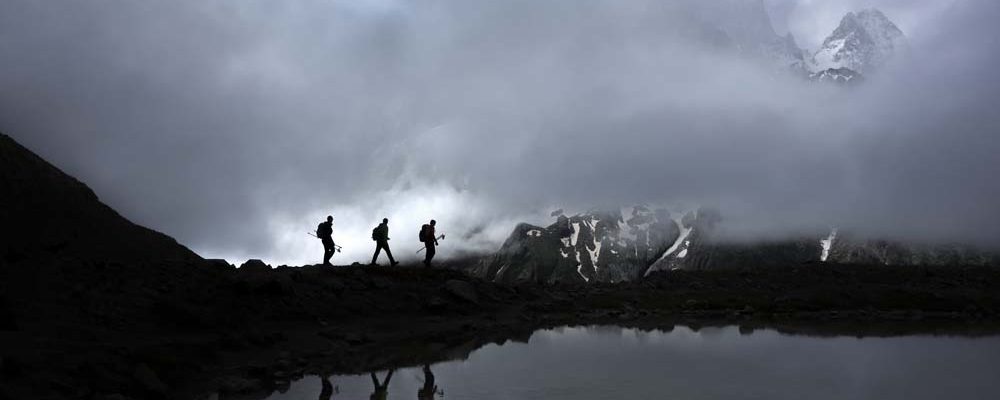
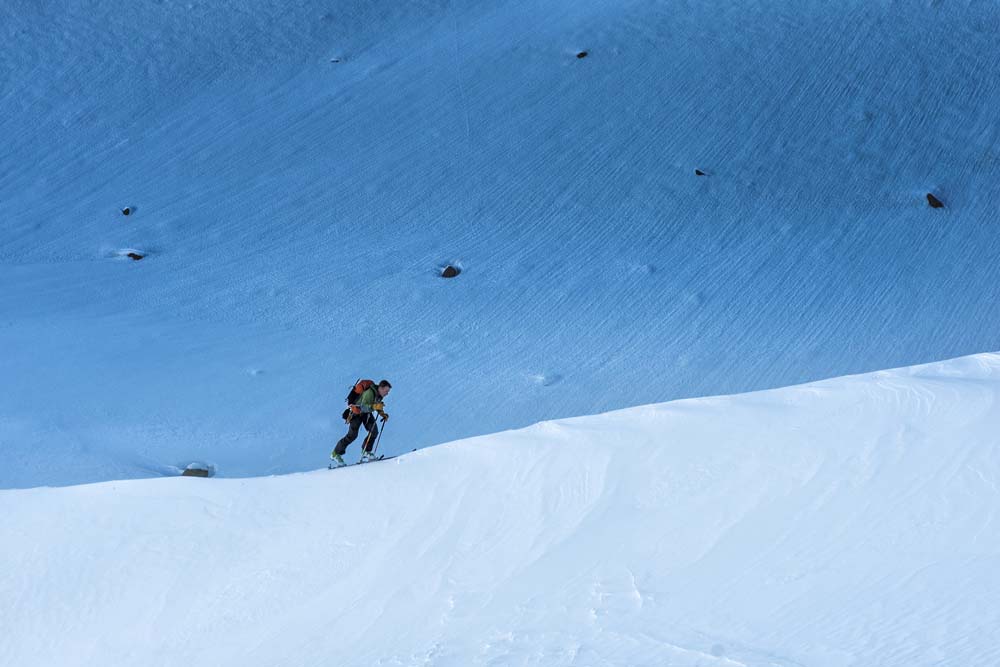
The world of photography has changed – digital cameras have removed the mystique from the ‘good old days’ of film photography where photographers had to wait often a week after they returned home to see the results. Now, everybody with a phone or pocket camera can take a photograph, instantly examine it, and take the shot again if it isn’t correct. In the same way that the development of the circular saw allowed even the most ‘ham fisted’ to cut a straight line and thereby reduced the need for skilled carpenters, digital cameras have opened up the world of photography to everyone. However, the development of the circular saw didn’t remove the need for skilled carpenters and its the same with photography – a great image, like a great piece of furniture, still requires the eye of a skilled craftsman. However, with the ability to take thousands of shots with ease, everyone can pull a good photo out of the bag now and then. In this series, I want to help you decide what is the right camera for you, how to carry it and use it in the mountains, how to become more consistent at taking good photographs and improve images through post processing.
This first article in this series is a bit ‘geeky’, but to make an informed choice of camera equipment and understand the subsequent articles there are a few terms that need to be clarified. Keen photographers must excuse me if I simplify something too much for them.
MEGAPIXELS AND SENSOR SIZE
A digital cameras sensor has thousands of tiny light sensitive units called photo sites, but for the purpose of this article, pixels. These capture the colour and intensity of light and send it to a memory card for viewing and/or later processing.
Sensors commonly come in three sizes:
Full frame (FX) cameras – same as 35mm film.
Digital format (DX) – a smaller sensor.
The micro 4/3rds format – smaller again.
A larger sensor allows each pixel to be larger, and bigger pixels capture light more effectively, they produce less ‘noise’ (grain) in poor light. Another consequence of having larger pixels is that they capture a greater range of light without this becoming solid white or black (a higher dynamic range). This reduces the chance of blown highlights in the sky or other bright objects, and preserves more details in the shadows. If you have two cameras with the same number of pixels, but different sensor sizes, the one with the larger sensor will usually produce better quality images because the pixels will be larger. That said, higher pixel counts are often seen as a good thing because they enable more detail to be recorded and allow the image to be cropped. Most cameras of the modern era have plenty of pixels with even the cheapest cameras having at least 5 or 6MP, which is enough for decent size prints.
Therefore, photographers who do not need to produce very large prints need better pixels not more of them. In general, compact cameras use very small sensors with very small pixels and like small stereo speakers, they can be a bit tinny. Therefore when buying a camera consider the sensor size along with the number of pixels.
CAMERA TYPES
The best camera is the one you have with you! Great pictures are taken with a phone or a compact camera and terrible images with a professional camera. If your aim is to put images on Instagram or Snap Chat then your phone will probably do the job better than a high end camera. But serious photographers use top end ‘pro’ cameras for a good reason. They are well designed, more durable, have better sensors, and larger LCD screens. They work over a wider range of conditions such as poor light, and they capture more details in the darker and brighter areas of the image. The camera controls such as ISO, modes etc are accessible, easy to operate, and are more pleasant to use even with gloves on. Cameras that hide the adjustments in menus make life difficult when changes need to be made rapidly, some even miss out important adjustments such as auto ISO or RAW.
There are cameras that fit between the below categories and even within each category there is a wide range of features and prices offered, but broadly, there are four types of cameras.
Digital single-lens reflex (DSLRs)
DSLRs utilise a mirror that reflects the image from the lens, via a mirror onto a screen allowing us to view the actual image to compose and focus. The mirror flips up when you take the photograph so that the light can hit the sensor. These are the most versatile cameras, offer the highest performance, better autofocus speeds, and longer battery life, but are larger and heavier. The biggest advantages of SLRs is the optical and not electronic, viewfinder and the ability to put excellent glass in front of the sensor.
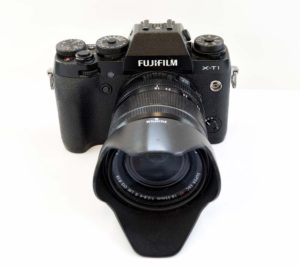
Mirrorless interchangeable lens camera
These are mostly based on the micro 4/3rds system and unlike SLRs do not have a mirror; instead, they use the rear LCD screen or an electronic viewfinder to display an electronic version of the image. The lenses can be changed and the quality of the images is very good. The downside of these cameras is the clarity of the LCD screen when in bright sunlight, the quality of the image in the electronic viewfinder, and the lower battery life due to having to feed the image constantly to the viewfinder. They are smaller and lighter cameras because they have no mirrors, glass screens, or prisms.
Semi-compact ‘travel zooms’
Do-almost-everything cameras, but none of them really well. These are what most people use and often have big zoom ranges. A few may fit into a pocket, but many will need a small case. Very few have optical viewfinders; they are all rear LCD-based, which can be a pain in bright sunlight, and most of the adjustments are in the menu.
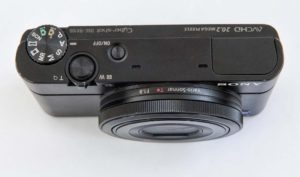
Super-compacts or point and shoot
The smallest cameras, but they are the least versatile and with the advent of phone technology these are dying out.
DON’T FORGET THE LENS
The lens is simply the means of focusing the image onto the sensor. Any lens can do that, but just like cameras, good lenses are good for a reason. Putting a cheap plastic lens on an expensive camera is like buying an expensive stereo system and putting cheap speakers on it. Try to spend the same amount, or even more, on the lens as you have for the camera; after all, it is the quality of the light hitting the sensor that really matters. That said, the gains in quality can be offset by learning to get the best from whatever lens you have. Even expensive lenses are not so good when the aperture is fully open. Intelligent use of aperture is far more important than the choice of lens. Most lenses are at their sharpest two/three stops above their widest aperture and two stops below their smallest. Top quality lenses extend this range.
Lenses are designed to suit either FX, DX or micro 4/3rds cameras. You can interchange them, but it is not advisable as it might cause problems with sharpness of the image. Focal lengths – this is the distance between the lens and the image sensor when the subject is in focus, usually stated in mm (e.g. 28mm or 100mm). With zoom lenses, the minimum and maximum focal lengths are stated, for example 18–55mm. Generally fixed focal length lenses or ‘primes’ (e.g. 35mm or 50mm) produce better quality images than zoom lenses, as there are less lens elements to affect the light. Primes are also lighter and smaller, but they do mean that you have to move closer or further away from your subject to compose the shot, this is not always possible in the mountains or when trekking. Mountain photography is one of the best arenas for using a zoom lens because you only need one lens cutting down weight and in a dusty environment it eliminates the need to change lenses during shooting. Buy the best quality you can afford, because modern top quality zooms can challenge prime lenses for quality, but ordinary zooms are still outdone by primes. The longer the zoom range the less likely it is to be a good quality lens through the range of apertures.
IMAGE STABILISATION/VIBRATION RESISTANCE (IS/VR)
IS/VR is a relatively new invention and has changed the way photographers shoot in low light and with longer focal length lenses. IS/VR lenses detect movement of the lens/camera before and during exposure. They use various devices to shift the optical image either in camera or in the lens to counteract this motion. IS/VR that is found in the lens generally has smoother performance when using longer focal length lenses. In-camera IS has the advantage that you can mount any lens on the camera, but it is not so good with longer focal lengths.
The rule of thumb with non VR lenses is to use a shutter speed double the focal length – e.g. with a 200mm lens shoot using a minimum 1/400th shutter speed and with a 35mm lens, 1/70th second. An IS/VR lens will give you the same image quality at three to four shutter speeds slower than usual.
Don’t use IS when using a tripod because the IS detects its own vibrations and starts moving around, even when the rest of the camera is completely still. This can cause blurred images.
IS/VR help photographers to achieve sharper images with all focal length lenses when you don’t have enough light. VR only helps reduce camera motion, it can’t do anything to stop the movement of the subject.
RAW AND JPEG
Cameras can record the data from the sensors in a number of ways. The two most popular are RAW and JPEG.
RAW files preserve most of the information without processing or compressing the file. They can be large files and you need a computer and software to process them.
JPEG is a compression algorithm, and information is lost during the process – but the files are much smaller. When you shoot in JPEG the camera manipulates it to produce what it thinks is the best image from the data. Cameras typically capture 12 to 14 bits of data per pixel, but a JPEG file only holds 8
per pixel.
Raw files are not recognised by all computer systems and will have to be saved as JPEGs for printing or putting on the internet.
Use JPEG when:
The light is perfect
You don’t want to post process images
You want to save space on your hard drive
Take everyday snapshots
Use RAW when:
The light is not so perfect
You want the best quality image
So which camera is best to take trekking / mountaineering?
There is no right answer to which is the best camera for you, but asking the following questions may help:
How serious a photographer are you?
For the best quality images and the greatest versatility in all conditions DSLRs are hard to beat, but some top-end mirrorless cameras are not far behind. Compact cameras are great for slipping into a pocket and the quality can be very good, but even with these you need to pay attention to the lens quality and the sensor size.
How good do your images need to be?
Top-end cameras and lenses produce the best quality, but when the light is perfect the gains in image quality are not always huge. A better lens will make a bigger difference to quality than a better camera.
Are you going to print them or look at them on a computer or TV screen?
The computer screen is the limiting factor more than the camera/lens, and the quality of the printer will make a bigger difference than the camera and lens will.
Are you willing to compromise some quality for a smaller size and lower weight?
Carrying a large, heavy camera is a commitment and an inconvenience. The size and weight of the camera is not directly proportional to the increase in the quality of pictures.
How easily do you want to be able to change settings?
Having to go into the menu to overexpose or change other settings is a pain for a serious photographers, but if you simply want to put the camera on auto and shoot away, then having the settings easily available will not make a big difference.
Do you want to shoot in low light and still have great results?
If so, pick a large sensor camera with less pixels.
Do you want to carry more than one lens?
For ultimate quality and low weight, a prime is the best choice; otherwise, a top quality zoom will do a good job.
Do you want to shoot in RAW?
Most cameras that shoot in RAW will also take JPEGS at the same time.
Does the size of the LCD screen and whether it articulates matter?
This can help when in bright sunlight.
What do I use?
I sell my images though a professional agency (westend61), galleries, and to magazines. I have three types of professional standard cameras and I shoot in RAW all the time. I own a Nikon D810 with top-end Nikon ED 16-35mm, 24-70mm and VR 70-200mm zooms. I also have a second body, the D750, which operates better in low light conditions because it has the same FX sensor as the D810, but fewer pixels. I use these two cameras whenever I can because they cope well with abuse and low light and I can change settings very easily. The enormous pixel count of the D810 also allows me blow subjects to larger sizes. I have carried them to 7,000m, but I have also dropped lenses and damaged my camera on technical routes because they were bulky. A costly exercise!
I also own a mirrorless camera – the Fuji XT2 with an average quality 18-55mm zoom lens for when weight is crucial, such as technical climbing. Image quality isn’t as good as with my Nikon D810 but it is close and with a better lens it would be even closer. The disadvantage is the in ability to change all the settings as easily as my D810. I also have a Sony RX100 compact camera that shoots RAW, but I rarely use it.
CAMERA TERMINOLOGY EXPLAINED
Aperture/Fstop
This controls the amount of light coming into the lens using a diaphragm. Higher Fstop number means a smaller aperture and smaller Fstop number means a bigger aperture.
Shutter speed
This is the amount of time the camera lets light reach the sensors for. A screen/shutter can remain open for seconds to very fast speeds of 1/8000 of a second.
ISO
The lower the number the less sensitive the sensor is to light, but the lower the noise (grain) in the image. The higher the ISO the more sensitive the sensor is to light, but the greater the noise.
Digital/optical lens
Some cameras offer an impressive sounding ‘digital zoom’ capability, but all it really does is blow the existing file up larger. I would avoid digital zoom cameras unless quality is not important. Optical zooms use the lens to bring the subject closer and quality is much better.
CAMERA MODES
Aperture Priority mode (A or AV)
User controls the aperture and the camera sets the appropriate speed and ISO settings.
Shutter Priority mode (S or TV)
User controls the shutter speed and the camera will set the appropriate aperture and ISO setting.
Manual mode (M)
This gives the user complete control over all the camera’s functions.
Programme mode (P)
A semi-automatic mode – the user controls ISO, white balance, and flash. The camera automatically adjusts the shutter speed and aperture settings
Auto mode
The camera will set everything for you, from your aperture and shutter speed right through to your white balance and ISO.
Bulb (B):
This holds the shutter open until the shutter is pressed again, useful for long exposures at night.