

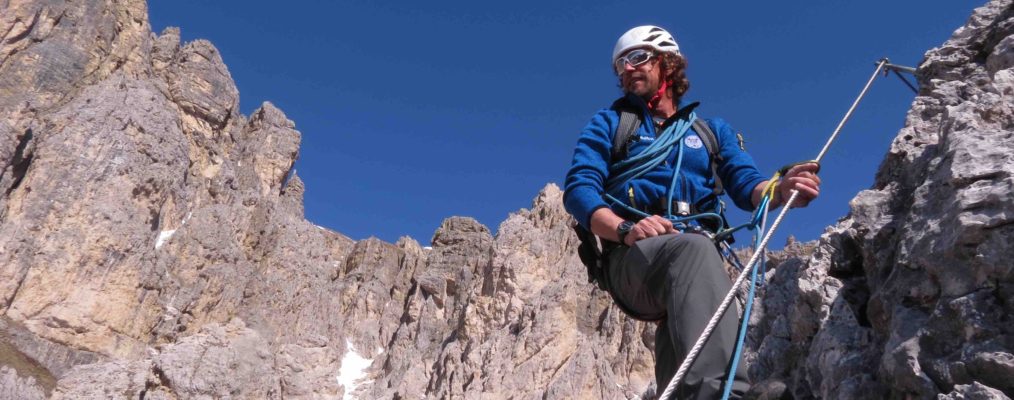


Although it may feel that you are in a clinical environment, you need to keep your wits about you when going round the circuit, and knowing how to deal effectively with all possible hazards is essential.
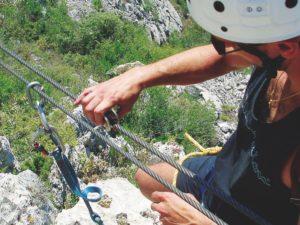
CLIPPING INTO SAFETY CABLES
Nearly all sections of a Via Ferrata circuit, be it a ladder, bridge or cargo net, will have a steel safety cable running alongside them, into which you clip your lanyard karabiners for security. These will be anchored to the cliff at various points along their length, commonly around 2–5m (6–15ft) intervals. It is important that you are always clipped in to this cable where one is supplied,
with at least one of your lanyard tails at any time.
Starting at the bottom of a ladder sequence, for instance, you would have both of your tails clipped in to the cable. Let’s say it is running on the left-hand side. Start your way up the ladder, letting the tails tow along beside you. One thing that you could do here is to have your left arm under the tails, so that they run over your forearm which in turn keeps them high, as doing this helps to avoid them dragging and catching too much on obstacles. As you approach a cable anchor, stop a short distance below it, unclip your upper tail from the cable and put it back on above the anchor. Thus, if you slip, you will only fall a short distance. Now unclip the second tail, clipping it back on next to the first.
Only by doing the unclipping and clipping in this way will you be sure of always having at least one connection point to the cable, in case you slip during the swap-over process.
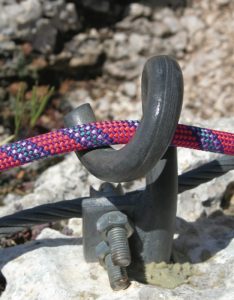
The rope running through a pig’s tail
USING PIGSTAILS
Many cable anchor points, particularly along the line of ladders, will be fitted with curly pigstail rope connectors. These are provided so that you can use a rope for any members of your group who may need a little extra confidence, or in areas where the cable protection isn’t quite as good as it might be. Moving together skills can be utilized here (with the connection to your harness being the same as that for scrambler’s coils, covered in the ‘Alpine Climbing’ section), but you must understand that, if you are in the lead and your partner falls off, you will very likely be pulled backwards as well. Thus, a different method of using the rope needs to be found, and the one that follows is an option and quite simple to remember.
Both you and your companion tie on to the rope, with them being left in a safe position, or at a point where they are well secured by being clipped to a part of the safety cable or a handy rung. You make your way up the section of ground, looking after your own security with the lanyard as normal, but this time clipping the rope through the pigstails provided. On short sections of moderate ground that go straight up this may not be necessary, as the rope will run in a straight line to your partner. However, if the route is overhanging or wanders around the rock face a bit, as will often be the case, the pigstails help keep the rope in line for the benefit of your partner, so that they will always be supported by it and not be pulled off line.
Once you have gone past the tricky bit, you can then belay them up. This is quickest done with a direct belay on an Italian hitch, on to a karabiner and sling around an appropriate part of the metalwork, perhaps a solid cable attachment point or ladder step. Once they have joined you, you can either repeat the process if necessary or pack the rope away and continue as normal.
If you are using the rope to negotiate difficult sections, you may want your second to belay you as well. In this case, they can do so using an Italian hitch off their harness, unless of course a belay device is available. You can use the pigstails as before, but might also want to create extra security by placing a sling around a ladder rung every so often as an extra runner. Once you are past that particular section you can belay as before and bring your second up, who will strip out any gear that you have placed.
In descent, the rope can be used as a safety line, being paid out as needed from an anchor, normally on a direct belay, with the person being safeguarded running it through the pigstails as they descend to ensure that they are being protected from the correct direction all the time. If you also need to be protected as you descend, you can run the rope through the top ladder rung, for instance, and your partner can pay the rope out to you as you go down. Once you are safe, you simply untie and pull the rope through.
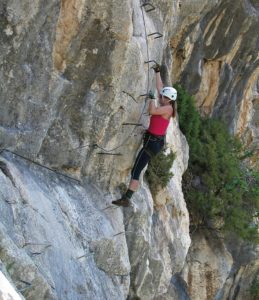
A steep ladder section
LADDERS
These are a major feature of most Via Ferrata circuits, and will either be continuous ladders or a series of U-shaped metal rungs drilled into the cliff, sometimes called stemples. These ladders provide access up and down sections, and will also have been placed on very steep and overhanging terrain, ground where only cargo nets could otherwise provide passage.
Those placed on steep ground can be quite tiring, so make the most of any rest opportunities that may present themselves. The karabiner on the short loop on your lanyard will be useful here, as you can clip this directly into a ladder rung and use it as a resting point if you need a breather.
Take care in wet or icy conditions, as the ladder rungs can be quite slippery. Also, make sure that your hands aren’t getting too cold, as it will be difficult to hold on for long if they do. This is where the purpose-designed non-slip gloves come in.
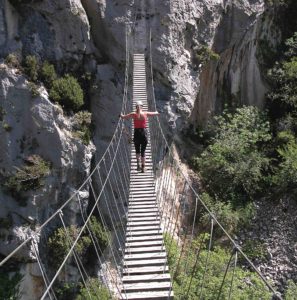
Crossing a wooden bridge
BRIDGES
These come in a variety of styles and constructions, but can be roughly categorized as those with a solid platform underfoot and those simply consisting of wire. The first type looks to be the most solid, and they certainly allow for good foot placements. However, due to their weight and the distances that they span, they tend to oscillate, both up and down and side to side. Take it slowly at first so that you get your balance right. Keeping your feet to the centre line will stop the bridge from wobbling sideways quite so much. Once you have got your confidence up you can walk as normal; a springing gait is helpful in compensating for the movement of the bridge. If there are other people on the bridge and you are a bit nervous, it may be worth waiting for them to cross so
that you are not being affected by their foot pattern.
Bridges will have a safety cable running alongside, normally at a slightly higher level, and you should always clip into this for extra security.
Wire bridges come in a variety of styles, the commonest being either the two- or three-strand crossing. Curiously, most people find the two-strand crossing the easiest to deal with, as your feet are on the lower wire, your hands on the upper one, and you can get yourself into a position that feels quite stable, usually leaning back slightly. Three-strand bridges, where you will be in a Y shape when holding on, can feel a little less secure as your body weight can move around quite a lot.
A shuffling motion with your feet sideways to the cable will normally be most comfortable, although crossing them over would be fine. You can either swap your hands as you go along or shuffle these as well. Be particularly careful, though, that there are no loose strands of wire sticking out from the cable, and for this reason the use of gloves is highly recommended.
There will be a safety cable, usually in addition to the bridge wires. This should be used, and don’t be tempted to clip your lanyard on to one of the bridge wires unless there is absolutely no other option. Apart from having the karabiners knocking into your hands all the time, it would be easy to catch a finger or glove if you slipped, and end up suspended from these and not the lanyard.
As with the more solid bridges, it may be best to wait until anyone else ahead of you has finished their traverse before stepping on to it, for their sake if not your own!
CARGO NETS
These provide an alternative method of climbing up bulging and overhanging areas of rock. The difference between these and rungs is that with ladders you will be hanging out on your arms from the cliff, with a net you are usually on the inside looking out, using your legs a lot more.
Climbing up them is generally simple, as you have many options as to what to hold on to for both hands and feet. There will also be a safety cable, which once again should always be clipped for safety.
Preparing to ride a zip line
ZIP LINES
These are an exhilarating section of any circuit, and they are often left until right at the very end. Basically, they will consist of two lengths of cable, one of which is for the pulley and the second being for your safety lanyard. Often there will be an option for you to bypass this section, as not everyone will want to take part.
A pulley is connected to the main cable and clipped to your harness with a screwgate karabiner. This karabiner will often be the one on the short tail on your lanyard, as this gives you important clearance between your body and the cable. Alternatively, you can use a sling from your harness and adjust it to the correct length: long enough for you to be hanging away from the cable but short enough that you can reach the cable to help yourself up at the end of the line if necessary.
Onto the second cable you put your maillon, and do it up. Clip a tail from your lanyard into this, with the other tail clipped out of harm’s way at the back of your harness. It is not recommended that you just clip the lanyard’s alloy karabiner directly on to the safety wire, as the karabiner will be damaged as the cable slides through it.
Make sure that if you have long hair it is tucked well out of the way under your helmet. It is absolutely essential that you do not touch the cable as you go along the line, as you will be travelling at quite some speed and could severely damage your hands, with either the wire or the pulley, so ensure that you are happy with the position that you will be hanging in before you set off. Holding on with both hands to the short tail, underneath the karabiner that connects you to the pulley, will be fine. Get yourself into a starting position, with your weight just coming on to the cable and your feet pointing forwards in the direction of travel. Once you are ready and have done a final check, commit your weight to the cable and off you go!
The speed will seem incredible, as will the noise from the pulley, but soon it will be time to think about landing. If you have used a steel maillon on the safety rope, pulling down on your lanyard will slow you down a little. Don’t do this if you are not using a maillon, as the alloy karabiner on your lanyard will be damaged. Lift your feet up to reduce the bump at the end, although many circuits will have padding as a safety measure. Once you have stopped moving, get yourself to the end of the cable if you aren’t there already. Use the spare tail of the lanyard (the one that you clipped to the back of your harness) to clip into the safety cable on the rock to keep you secure whilst you dismantle the pulley and maillon. You can now continue as normal.
Words and images: Pete Hill Main image: Chris Kempster